I love these little things...as anyone who's been in the shop recently and had little pots of coloured powder waved at them will know! There is sooo much that you can do with them, here are just a few things to get started.
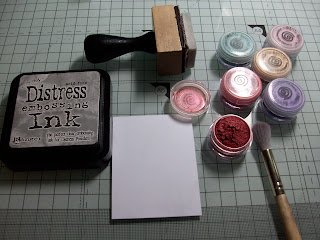
First off, Mica Powders are really shiny pigment powders, this is what they look like;
They come in little sets of 6 with a soft, fine bristle applicator brush and an empty mini mister. That's my distress embossing ink in the photo, brilliant ink for mica techniques!
Stamping is one of the easiest fun things you can do with these clever little powders. This is the Jesse Edwards Home for Christmas Urban Stamp which I am so in love with at the moment!
So first off, ink up the stamp in clear ink. Versamark, Colorbox, Ink it Up and a variety of other clear inks will work too, but Tim Holtz's is one of the stickiest I've used so I'd recommend that one if you're after a new clear ink.
Then stamp it onto your cardstock;
I'm using Antique Tones, which are "interference" powders. That means
they react with other colours, so they're great fun to use onto darker
cardstock. There are other sets available which work really well onto
white cardstock too, but I love the effect of the interference powders.
So, all you need to do is dip the brush that comes with the set into the powders, and gently dab it onto your cardstock.
Here I'm mixing together several different colours from the Antique Tones set. I'm using Antique Gold, Antique Red, Antique Green and Enchanted Green (Enchanted is the white-looking one)
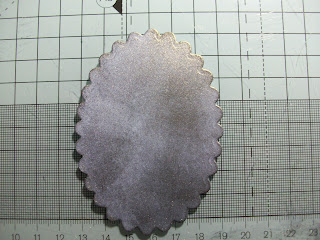
Next, you need to brush back and forth across the cardstock to brush off the excess. When you see the powders flat on, they'll be a darkish colour like this:
But if I hold that up to my desk lamp and take a photo...
How amazing is that!! It does look even shinier in real life, the photo only half manages to capture how gorgeous this really looks!
And here's a card made with this technique:
The other technique on this card is really fun, and I've done a video tutorial on it here: Mica Powder Background Video Tutorial but I'll give you a quick run down of how it's done because I managed to take some fun photos of this technique in action!
It's very simple, first off, cover your piece of white cardstock in clear distress ink.
Next, brush on an interference powder. I'm using Antique Gold here. A light coloured powder from another set will also work, like the lovely Soft Gold from the Festive set.
Now, this will look a bit rubbish at first! Don't worry, it's supposed to. Interference powders are designed to react with other colours, and we haven't added another colour yet, we've used white cardstock and clear ink.
This is the fun bit! Next you need to add colour. I've made up a mini-mister with Black Soot Distress Ink re-inker. These are actually designed for re-inking distress pads, but you can do all sorts of fun things with them on their own. This is what they look like, and they're £3.99 to buy:
You need to add 10 drops of re-inker to a mini-mister, then fill the rest up with tap water. And then you need to spray! About 3 squirts from a distance of something like 5" works well. And as it dries, watch the magic happen!
I sat there and took a bunch of fab photos as it was drying, this took about 10 seconds or so I'd say:
How cool is that?! It becomes a gorgeous, aged vintage background. But the shine really comes out.
There is so much more than just this you can do with mica powders, but I'll get onto that next time!
-
Click here for the next part
-
Part 1
Part 2
Part 3


No comments:
Post a Comment
Please feel free to leave a comment!