Monday, 12 November 2012

Demo Day Goodies!

Our Demo Day went fabulously well! Was lovely to meet everyone and share some ideas for some of the gorgeous new goodies we have at the moment.

For anyone that missed the day, or anyone who wants to have a second look, here are some of the lovely things we made:

(By the way, you can see all of these on our Facebook Page too)


This is Boofle made using Tim Holtz Distress Inks, one of my favourite things!

Click here to download the instruction sheet for the Boofle Card: DOWNLOAD FILE

 This gorgeous card is made using Artiste Markers (More on those HERE) and a lovely Tulip Urban Stamp.

I love that stamp! So very cute! And the little dog just reminds me of my little dog...

Meet Buster. Totally not relevant to cardmaking, but it's a very cute photo!

Click here to download the instruction sheet for the Tulip Card: DOWNLOAD FILE

Here are a few other things made using the Artiste Markers:


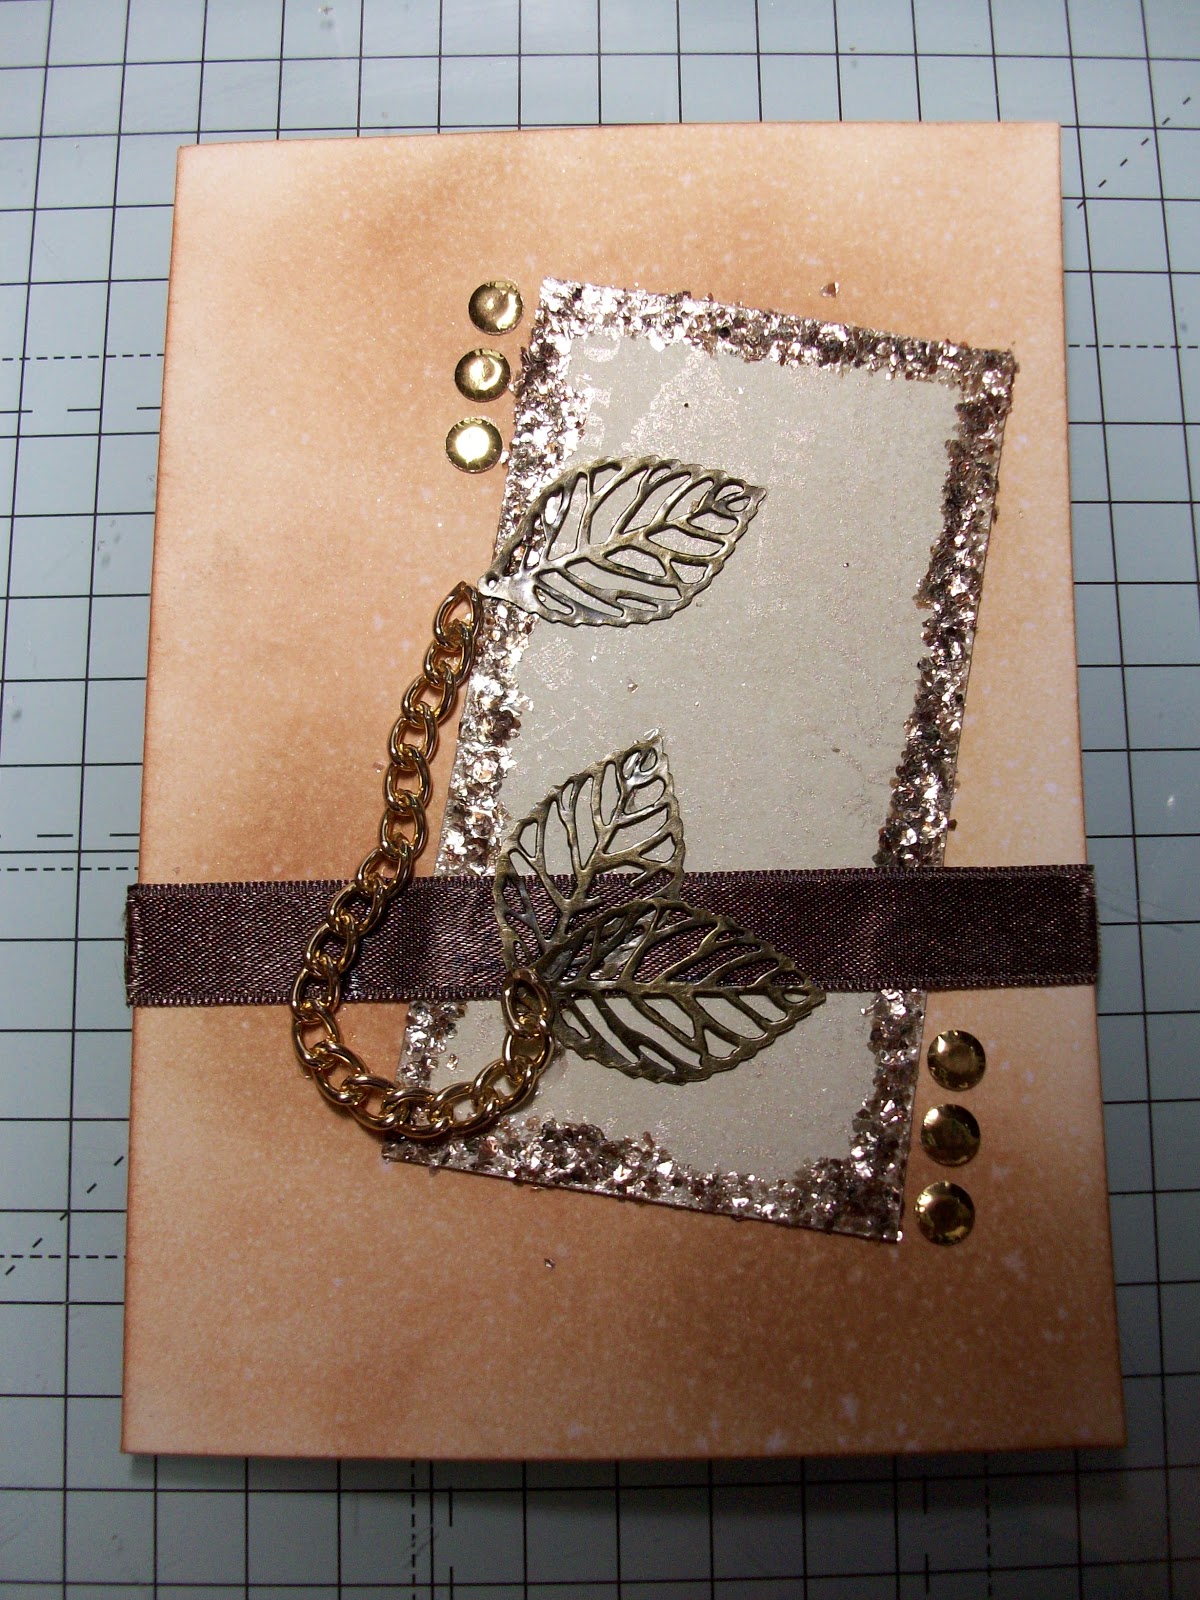
We also had a play with Mica Powders! A video showing the ink-spraying technique used on the background can be found here: Mica Powder Backgrounds Video Tutorial

How gorgeous is that! When you see this card in real life, it really is amazingly shiny.

We made a few other things with Mica Powders and with Mica Flakes:


Click here to download the instruction sheet for the Mica Powders card: DOWNLOAD FILE

This is Boofle's decoupage! I do like him, he's ever so cute. And the cards we made out of the Ultimate Decoupage pack were so quick and easy to do, but the results were stunning:


The pack is so full of goodies! There are papers, boxes, borders, decoupage, toppers and so much more. I do like toppers, you can make nice quick, easy cards with them, but they look so effective when they're done:


And here is one of the little bags you get in the Boofle Ultimate Die Cut Set:


We made some other adorable little boxes too. These are ideal for little gifts, or for table decorations:


And..um...the chocolate's missing from this one! Can't think why...


Hope you enjoyed seeing it all as much as I enjoyed making it!

All the cards and other samples are on display in the shop, so if you'd like to see them in the flesh you're very welcome to pop in and have a look and we'll be happy to show you the bits we used to make them and how they were done.

Friday, 26 October 2012

Sneak Preview! Art Deco...

Check out some of the gorgeous goodies which will be coming to us soon! They're due to be arriving just before our Free Demo Day, which is Saturday 10th November.

Art Deco! :)

There really are some lovely things coming our way...

Beautiful large decoupages designed for A5 cards. (That's A4 folded in half...I can never remember which A means what!)

This one is just stunning:


But I think this one is my favourite so far:


Although they're all lovely! So I'm really not sure!!

There are some really pretty toppers coming too, as well as gems, feathers and all sorts of other things in the Art Deco range.


There's another couple of ranges coming too, one of which is Papermania's "Just to say..." 


These are the clear stamps, and I have to say, I'm hugely impressed with the quality! The clarity is really, really good. The designs are all what I'd call "useful" things! Stuff that works for more than one occasion. This lovely floral one is designed for a thank you, but it could just as easily be a birthday, wedding or something else. 
(Not the nicest cards to have to make, but there's a very good sympathy and thinking of you set too.)

This is the thank you stamped and coloured with Promarkers:


Isn't that incredible! I just had to take a close up shot of those flowers, hopefully it's come out well enough for you to see what I mean about the clarity:


I have to say, I surprised myself! I wasn't convinced it was going to be that easy to colour, but it really wasn't too bad at all and didn't take me very long. The shading on the flowers is done by colouring a darker promarker over the top of a lighter shade, really simple to do.

Oh, and I just had to try one out with Mica Powders...


I've coloured it with promarkers and used a gluepen to highlight the petals with the Micas.

And then I went a bit nuts with glitter...


...but I'm very pleased with the result!

Just want the Demo Day to hurry up and arrive now! There are some fab urban stamps in the art deco range which I've got my eye on!


Monday, 22 October 2012

Mica Powder Backgrounds - Video Tutorial

Our first ever Video Tutorial is finished!

I am so loving these new Mica Powders! There is so much you can do with them, and they really do look wonderfully shiny and gorgeous when they're done.


How lovely is that!

Mica Backgrounds


If you can't see the video, or want to watch it full size on youtube, click this link or copy it into your web browser address bar: 


Hope you've enjoyed! 

We will also be showing off these lovely Mica Powders at our Free Cardmaking Demo in the shop on Saturday 10th November!

Saturday, 20 October 2012

Cardmaking Workshops 30th Oct - 20th Nov

Are you thinking of making your own Christmas Cards this year?

Christmas Cardmaking Workshops


Whether you’re new to card-making or you want to add to your skills, there will be something for you!”

£10 per session

Tuesday Evenings from 6.30pm - 9.00pm

At:
Anne & Paul’s Sew Simple, 94 Church Road
Ashford, Middlesex, TW15 2PL

01784 255 742

All tools and materials provided to make 2-4 cards per session!

Please call to reserve your place – only 10 spaces available per session
Or you’re welcome to pop into the shop to book!

DISCOUNT ON ALL PRODUCTS PURCHASED ON THE NIGHT

Tuesday 30th October: Textured Stamping with Boofle
Have a go at a really fun and simple way of achieving a gorgeous textured effect using Boofle’s Christmas Stamps
(This workshop is great for beginners)

Tuesday 6th November: Markers and Home for Christmas
A card without an image! Try this unique design made using Artiste Distress-Style Markers, stamping techniques and an out of the ordinary layout.

Tuesday 13th November: Calendar Card
Create a truly striking, unusual Calendar Card which the recipient will want to treasure all year! This is a really special, interactive design!

Tuesday 20th November: Enchanting Easel Cards
Make a beautiful card that becomes a decoration! An elegant, yet simple design made using gorgeous DIY 3D Fabric Flowers created from the lovely Home for Christmas Fabric Paper.
(This workshop is great for beginners)


Workshops run every Tuesday for 4 weeks, then 1 week off, and then begin again.
Sign up at www.anneandpauls.co.uk to receive email
 updates as new workshops are announced!

Thursday, 18 October 2012

Free Cardmaking Instruction Downloads!

There are now a whole host of downloadable instruction sheets up on the website!

All of these sheets are for individual designs which we have made previously at one of our Tuesday Evening Workshops. They all have a list of what you need to make the card, instructions on what to do, and a little sketch to illustrate how the card looks when it's finished.

To see the ones available, click here or go to:

 http://anneandpauls.blogspot.co.uk/p/free-instruction-downloads.html

Enjoy!


Example

Tuesday, 9 October 2012

Artiste "Distress-Style" Markers!

These are just fabulous! This is the gorgeous new range of markers from Artiste. They work pretty much like Distress Markers, and there are so many techniques you can do. First off, you can just colour a stamped image, but you can also use them as watercolours. You can blend them using just water, and like distress markers, the colours will stay true. So if you try to blend two colours of pink, you end up with two shades of pink, not muddy brown! The colours themselves really are stunning, there's a Vintage set, a Pastels set and a Brights set. Personally, I'd recommend Vintage or Pastels...just yummy colours!

One of the coolest things these markers do is stamping! Here I'm using a gorgeous Henbury Lane limited edition floral watering can rubber stamp, the Vintage set of Artiste Markers, and that lovely Payperbox Premium White stamping card.


First off, I'm turning my stamp upside down and colouring direct to the rubber. Take your time and don't worry about the markers drying, they take a really long time to dry anyway, but you can "reactivate" the ink.


One really fun thing you can do is overlap colours. So here, I've coloured the rose petals in a light pink and I'm adding detail over the top in a darker violet. This gives a lovely effect once stamped.


So this is my finished coloured stamp:


Next, I'm going to "reactivate" the ink by misting on a little water from my mini-mister. The best way to do this is actually to squirt a bit of water into the air and wave your stamp through it.


Now you're ready to stamp! And this is the stunning result:


Gorgeous isn't it? I just love that effect!

The stamp in the photo is the one I've just stamped with, and you can take it one stage further and stamp it again! Don't re-colour, just re-mist and re-stamp. You'll get what's called a "second-generation image", a really nice, soft, lighter version of the first image that looks like this:


Now, you could just leave these alone, and they do look fabulous just as they are, but Artiste Markers are water reactive, just like distress inks. What that means is you can blend! Just use either a wet paintbrush or a waterbrush and just water and scribble over the image to drag the colour out:


And this is the end result:


Lovely!

Definitely loving the new Artist Markers! And they really do go perfectly with the wonderfully pretty Henbury Lane Wooden Stamps.

Artiste Markers are RRP £14.99 for 12, Henbury Lane Stamp RRP £4.99, Mini Mister RRP £1.45 and pack of 3 Water Brushes RRP £3.99


This is one of the stunning cards we made at a recent workshop using this technique. So proud of this card! Really does look fabulous when it's done!