Thursday, 18 October 2012

Free Cardmaking Instruction Downloads!

There are now a whole host of downloadable instruction sheets up on the website!

All of these sheets are for individual designs which we have made previously at one of our Tuesday Evening Workshops. They all have a list of what you need to make the card, instructions on what to do, and a little sketch to illustrate how the card looks when it's finished.

To see the ones available, click here or go to:

 http://anneandpauls.blogspot.co.uk/p/free-instruction-downloads.html

Enjoy!


Example

Tuesday, 9 October 2012

Artiste "Distress-Style" Markers!

These are just fabulous! This is the gorgeous new range of markers from Artiste. They work pretty much like Distress Markers, and there are so many techniques you can do. First off, you can just colour a stamped image, but you can also use them as watercolours. You can blend them using just water, and like distress markers, the colours will stay true. So if you try to blend two colours of pink, you end up with two shades of pink, not muddy brown! The colours themselves really are stunning, there's a Vintage set, a Pastels set and a Brights set. Personally, I'd recommend Vintage or Pastels...just yummy colours!

One of the coolest things these markers do is stamping! Here I'm using a gorgeous Henbury Lane limited edition floral watering can rubber stamp, the Vintage set of Artiste Markers, and that lovely Payperbox Premium White stamping card.


First off, I'm turning my stamp upside down and colouring direct to the rubber. Take your time and don't worry about the markers drying, they take a really long time to dry anyway, but you can "reactivate" the ink.


One really fun thing you can do is overlap colours. So here, I've coloured the rose petals in a light pink and I'm adding detail over the top in a darker violet. This gives a lovely effect once stamped.


So this is my finished coloured stamp:


Next, I'm going to "reactivate" the ink by misting on a little water from my mini-mister. The best way to do this is actually to squirt a bit of water into the air and wave your stamp through it.


Now you're ready to stamp! And this is the stunning result:


Gorgeous isn't it? I just love that effect!

The stamp in the photo is the one I've just stamped with, and you can take it one stage further and stamp it again! Don't re-colour, just re-mist and re-stamp. You'll get what's called a "second-generation image", a really nice, soft, lighter version of the first image that looks like this:


Now, you could just leave these alone, and they do look fabulous just as they are, but Artiste Markers are water reactive, just like distress inks. What that means is you can blend! Just use either a wet paintbrush or a waterbrush and just water and scribble over the image to drag the colour out:


And this is the end result:


Lovely!

Definitely loving the new Artist Markers! And they really do go perfectly with the wonderfully pretty Henbury Lane Wooden Stamps.

Artiste Markers are RRP £14.99 for 12, Henbury Lane Stamp RRP £4.99, Mini Mister RRP £1.45 and pack of 3 Water Brushes RRP £3.99


This is one of the stunning cards we made at a recent workshop using this technique. So proud of this card! Really does look fabulous when it's done!


Sunday, 7 October 2012

Joining a Katia Scarf

Since this is such a useful thing to know, I thought I'd do a proper post on it. If you fancy the idea of knitting one of these scarves, come in and have a look! We have a huge range of types and colours to choose from, and half-knitted samples of most of them so you can try before you buy.

Some of the Katia yarns will occassionally have a knot in them due to the manufacturing process, or maybe you might want to join up a couple of colours to make an interesting mulitcoloured scarf. It's really nice and easy to do! And this is how:


If you find a knot like this, first off, chop it off!


Make sure you end up with two fairly neat edges:


Lay these two edges over each other like this:


Next, pinch hold of the top of this and knit through two holes together as if they are one:


The two ends will be safely joined, and won't come apart.


You can leave them alone if you want to and just keep knitting. Due to the nature of the yarn the join shouldn't be noticeable, the next ruffle will lay over it hiding it. But if you want to, you can actually sew the ends in so they're completely hidden.


Just use a nice large needle and a piece of coordinating colour cotton and oversew the ends in place.


This is a few rows on.


Spot the join!


(It's about three rows down from the needle on the right hand side, but it's not easy to see at all!)


Thursday, 4 October 2012

We're having a free Cardmaking Demo!


Are you thinking of making your own Christmas Cards this year?
Christmas Cardmaking Demo

Whether you’re new to card-making or you want to add to your skills, there will be something for you!”

FREE CARDMAKING DEMONSTRATION

Saturday 10th November
From 10am – 4pm

At:
Anne & Paul’s Sew Simple, 94 Church Road
Ashford, Middlesex, TW15 2PL

01784 255 742

Discover the tips, ideas and techniques that make all the difference – plus grab fantastic discounts on all the tools of the trade!

Loads of Cardmaking Demonstrations all day on a wide range of techniques including…
Tim Holtz Distress Inks – Die Cutting – Papercrafting Techniques – Rubber Stamping

Plus loads of fantastic bargains to be had on the day!
One off Demo-Day-Deals - Starter Kits - Bargain Bundles

Fantastic Special offers on all sorts of ranges such as…
Papermania – XCut – Ranger – Anita’s – Docrafts and so, so much more!

Look out for our regular Cardmaking Workshops and our fabulously popular Introduction to Cardmaking” Beginner’s Class! Or check out our website for more info at:
www.anneandpauls.co.uk

Wednesday, 3 October 2012

Michael Powell Stamps and Promarkers - a match made in Heaven!

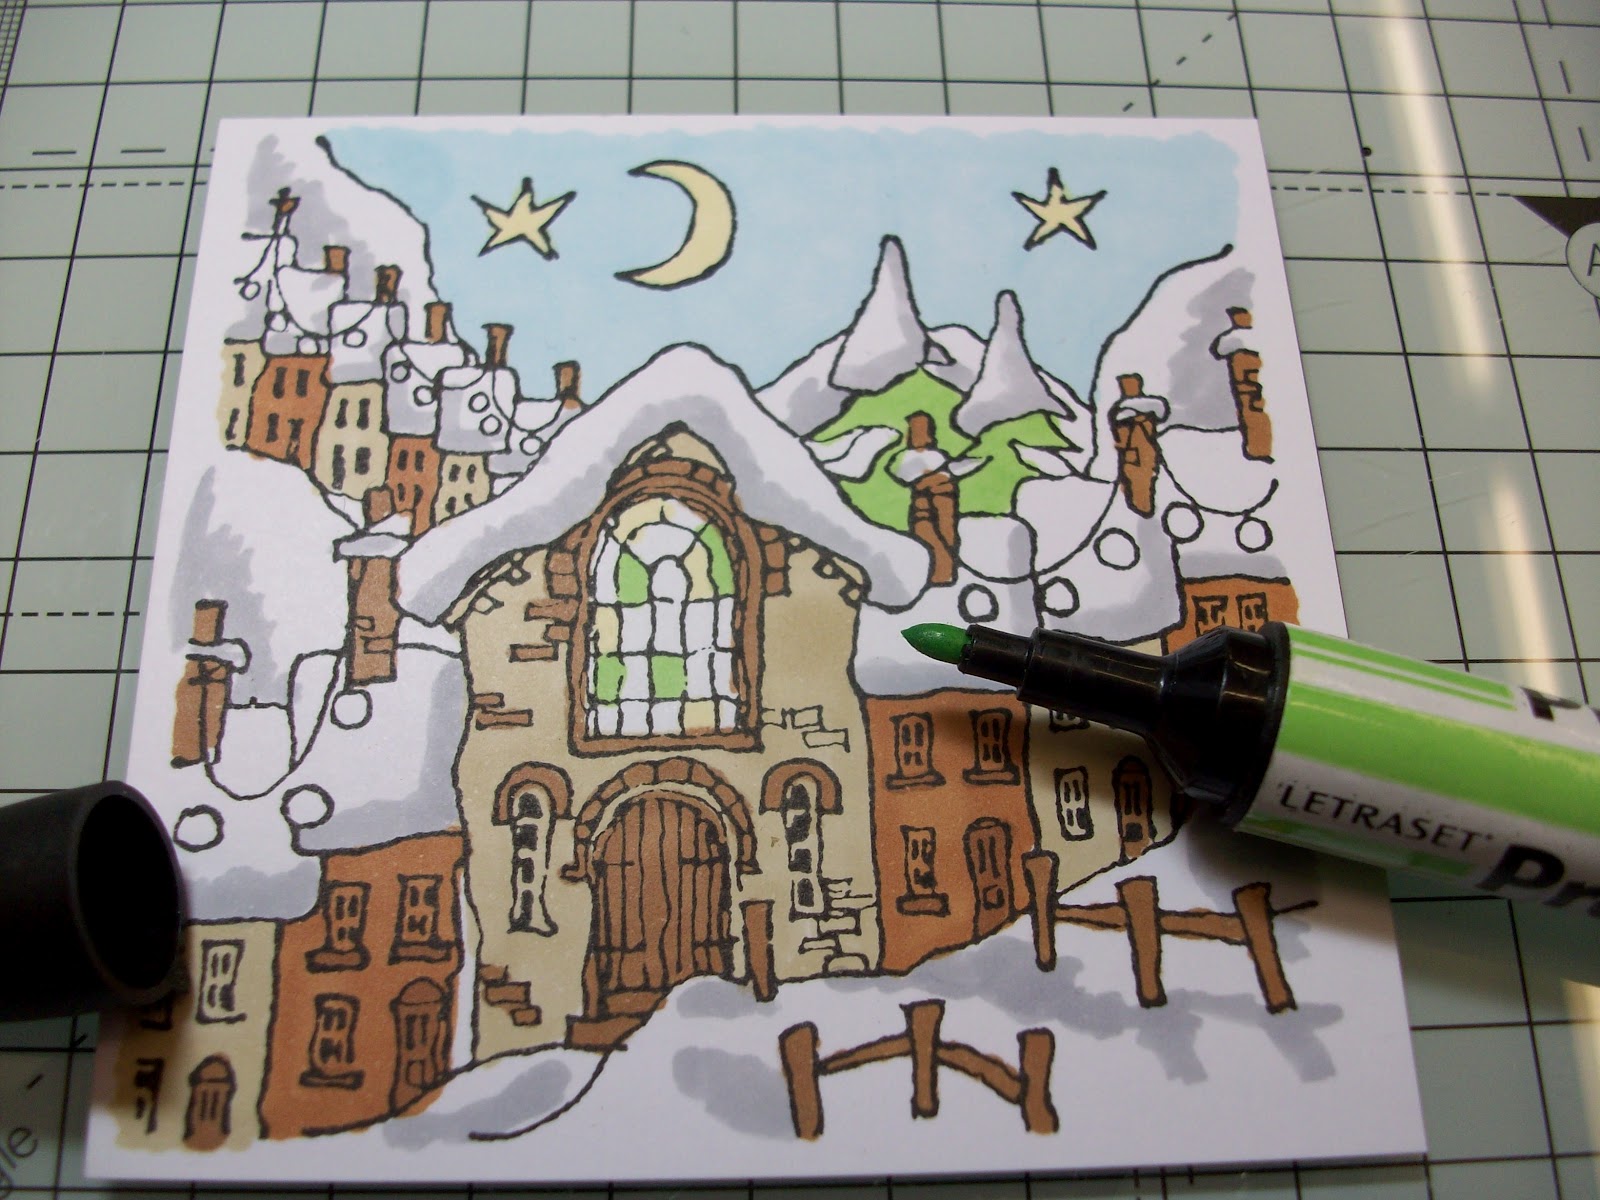
Loving these gorgeous Michael Powell Urban Stamps! They're perfect for colouring, and there's such a lot you can do with them.

This is just one of my favourite ways to colour in one of these stunning stamps.

First off, this is what you need; a clear block, a Michael Powell Stamp, (RRP £3.99) some Black Soot Tim Holtz Distress ink (Our price - £4.99) and Payperbox's premium smooth white cardstock.


So, I've stamped on my Michael Powell Stamp, and I'm just loving the clarity! The design is just so crisp and clear, and the Tim Holtz ink is a wonderful quality. It's a true jet black, and it doesn't smudge with Promarkers like some inks do.

Gorgeous, isn't it?

These are the Promarkers I'm using to start off with. They're from a set called "Build Environment". The Payperbox card makes an incredible difference too. It's a perfect stamping cardstock and works really well with promarkers, distress markers, distress inks, watercolours and a wide range of other media. RRP £3.99 for a folder of approx 25 sheets.


I'm keeping my Urban Stamp next to me whilst I'm working so I can copy the way it's coloured, although I will be using slightly different colors to do it. My first colour is Sandstone, and I'm colouring all the buildings I want this colour first. I'm going around parts of the windows because I want them a darker brown.


And I'm colouring in circles. This is the real secret to Promarkers! If you want that gorgeous solid, almost printed look, colour in little circles and the colour will go on much smoother.


And that's all my light browns done. Next up is the reddy-brown, it's called Terracotta.


And the third brown, Cocoa, is used for all the windowsills, doors, chimneys and other detailing. If you look, I've not been too careful with the light brown! But the dark brown will hide this totally when I go over it, so I can safely cover one colour with another.


And this is the result so far:


Next bit of colouring is the blue sky, again coloured in little circles:


I really love the difference it makes to use a light blue! This one's called Cool Aqua.


And just look at the stamp compared to the stamped image! Sorry Mr Powell, I'm afraid I prefer my blue...


Adding some finishing touches now, this is Ice Grey 3 and I'm copying the shading from the stamp itself to give the illusion of shadows on the snow drifts.


Adding a bit of yellow for the stars, and some on the window:


Green for the trees, and the window:

And some more random colours to fill in the window!


To finish off, I've coloured in the christmas lights and the rest of the window. I've added a "glow" to the lights by drawing little circles around them in yellow.


Ta da! Isn't that just stunning?


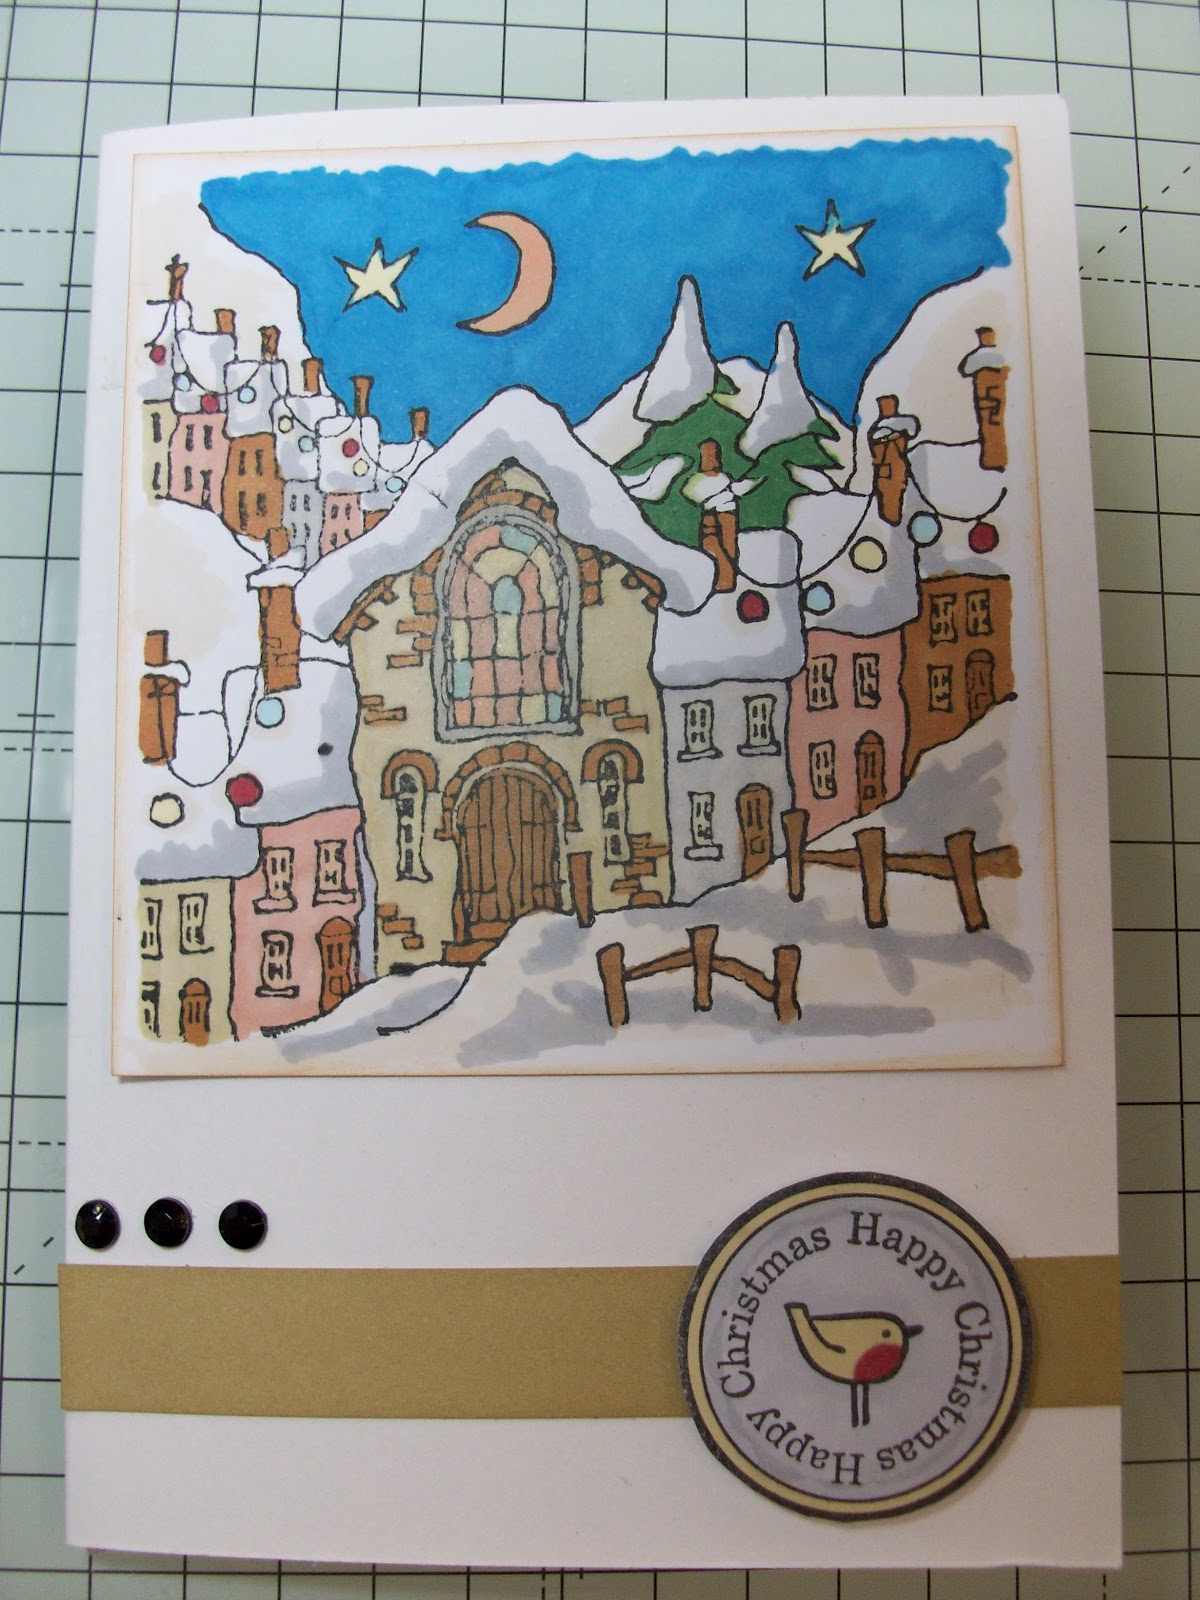
And here are a few cards I've made using the gorgeous Michael Powell stamps with Promarkers:


And the freebie Tulip stamp from the last Creativity Magaizine:


And this is another Michael Powell stamp done in Gold Mica Powders. How stunning is that?!


Hope you've enjoyed!

Tuesday, 2 October 2012

An Introduction to Cardmaking - Beginner's Class - 1st November

Due to the success of our previous Beginners Classes, we are pleased to announce we'll be running another one!!

There will be a new goody bag, and different designs to make, so if you attended the previous Beginners Class, there will be something new to see!


Anne and Paul’s Workshops
An Introduction to Cardmaking
Beginners Introductory Class with TWO demonstrations!

A fabulous opportunity to try out this wonderful hobby in a friendly, relaxed atmosphere!”

£25 per class

FREE CHRISTMAS CARDMAKING GOODY BAG WORTH OVER £15 TO TAKE AWAY TO GET YOU STARTED WITH CARDMAKING!

Thursday 1st November
From 6.00pm - 9.00pm

At:
Anne & Paul’s Sew Simple, 94 Church Road
Ashford, Middlesex, TW15 2PL

01784 255 742

Come along and try your hand at Cardmaking for Christmas in a friendly and relaxed atmosphere! There will be demonstrations on more than one design, and we will be covering a few of the basic techniques used in Cardmaking!

Please call to reserve your place – only 10 spaces available
Or you’re welcome to pop into the shop to book!

DISCOUNT ON ANY PRODUCTS PURCHASED ON THE NIGHT

As well as the goody bag to take away, all tools and materials are provided to make 2-6 cards on the night

Sign up at www.anneandpauls.co.uk  for email updates on our workshops