I love decoupage, so I think these Decoupage Medleys are just a brilliant idea! They're so different. They're a lot like normal decoupage, but there's no right or wrong order, you just stick them together however you like the look of them!
So, to start with let's look at
Normal Decoupage, which comes in sheets like this:
(By the way, this one is a die-cut decoupage, so everything is cut out and already glittered and embossed for you! It's by Lucy Cromwell and we have it in stock.)
The sheet is numbered B1, B2 and B3 to tell you which order to stick everything together in:
So, you push it all out and lay it out in order:
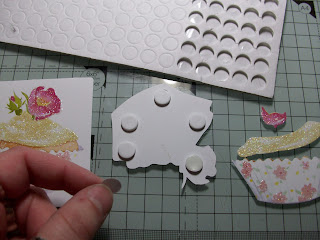
And then stick it all together with double sided adhesive foam pads:
And this is what you end up with:
Decoupage Medleys on the other hand, have no numbers!
(This is a new one from the Vintage Notes range)
This is great because it means it's up to you how you layer them up. If you wanted to, you could get 13 cards out of this one sheet by using them separately as toppers! They come in packs of two, so that's a lot of cards for £2.
Here's what I did with my sample sheet:
First off, I chose an A5 white card blank. I chopped down some of the new Vintage Notes paper to just under A5 size using the guillotine:
Here's a closer look at that paper because it really is lovely. I don't think the photo quite captures it, but it is linen textured the same as the decoupage medley itself.
Next, I've used the stick it roller to adhere the paper to the card blank. This has got to be my can't-live-without crafting gadget! Double sided tape in a roller, super quick to use!
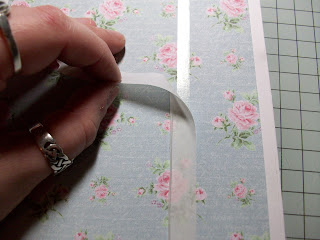
I've used double sided tape itself to stick the ribbon on, purely because I find it easier to stick down in a straight line! Anyone who's been in the shop recently might have had a roll of this stuff waved at them already, but if you haven't, trust me, it's brilliant! It's called finger-lift tape. It's £2.49 a roll, so it's the same price as normal double sided tape. But what's special about it is that the backing paper is larger than the tape itself, so its a million times easier to get hold of and peel than normal tape is.
Now that is a genius invention in my opinion!
Next, I've stuck on some ribbon. This is one of the ones you can buy by the metre in the shop, but I didn't quite have enough left in my box...so I snipped it in the middle, and I'll hide the gap with the decoupage.
Next up is the first layer of the decoupage medley. These are die-cut, so they easily push out from the backing:
I'm using the same foam pads between each layer that I used in the normal decoupage:
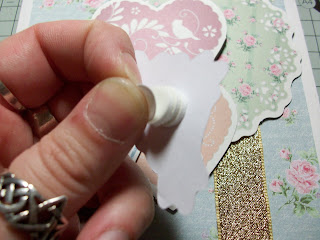
Although in some places, I've stacked the foam pads up on top of each other so I could play around with different heights:
And here's the finished medley:
This is what's left on the sheet by the time I'd finished:
Still plenty to do another medley. Although I chose to get mine to go a bit further and used them on several other cards later on.
Next up, the finishing touches. Gotta have a bit of bling! I glittered some parts using the glitz it glitter glues:
I also added some small pearls from the Anita's Gemstone Pearl Wheel:
I've actually stuck the pearls on using glitter glue, which is quite a cool tip. You put a largeish blob of glitter glue onto the card and set the pearl into it, which leaves you with a little "halo" of glitter around the pearl once it's dried.
To finish off, I picked up some larger self-adhesive pearls with my pokey tool and stuck them in the corners:
And here is my finished card:
Gorgeous!
I used up some leftovers to create another card using the Lucy Cromwell decoupage. In the Vintage Notes paper pack you get a sheet of greetings. This is a close up of the 12x12 sheet of greetings:
I chopped out the greeting I wanted with scissors, but because my cutting out is a bit wobbly I used the guillotine to straighten it up:
And here's the card I made with it:
I've used a little bit of Victorian Velvet Distress Ink to highlight the edges of the Lucy Cromwell decoupage and added some of the hearts from the Vintage Notes decoupage medley.
I'm definitely loving these decoupage medleys! I really like that multi-layered look you can get with them, and I love the endless possibilities. There are so many different designs you can come up with just using one sheet of these.
Hope you all like them too!


